Friday, April 23, 2021

Manage your blog's setting

 When you use Blogger on the web, you can manage your blog’s settings. The content below gives information on the different types of blog settings and how you can customize your blog.


Basic

Title

Your blog's title.


Description

Your blog's description.


Blog Language

The language of your blog.


Adult content

This setting is to indicate the content of your blog contains adult content, including images or videos that contain nudity or sexual activity. If selected, viewers of your blog will see a warning message and will be asked to confirm they want to proceed to your blog.


Google Analytics Property ID


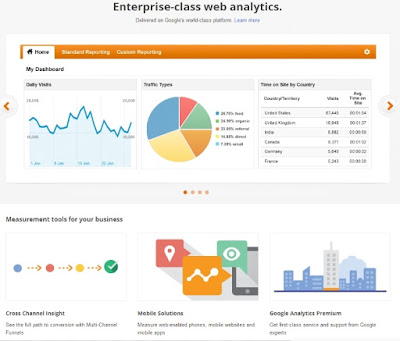
Incorporate Google Analytics to your blog to see how visitors interact with your site. Add your Google Analytics Web Property ID (for example, ) to start tracking your blog. This setting is specific to dynamic views and layout themes. If your blog uses a classic theme you need to manually add it to your regular theme.


Favicon

Upload a custom favicon.


Privacy

Listed on Blogger

Allow people to link to your blog from Blogger.com or other blogs.


Visible to search engines

Allow search engines to find your blog.


Publishing

Blog address

Choose a blog address or URL.


Important: The selected subdomain must be available.


Custom domain

Point your own registered URL to your blog. Blogs may not be hosted at naked domains (for example: yourdomain.com), but must include a top-level domain (www.yourdomain.com) or subdomain (blog.yourdomain.com). Your domain must be properly registered first.


Redirect domain

This option allows one redirect from the "naked" domain to the custom domain (for example, to redirect from "example.com" to "www.example.com").


Fallback subdomain


You can use the CNAME to associate your custom domain with your blog. Learn more about creating a CNAME.


HTTPS


HTTPS availability

This setting is only available to custom domains as Blogspot addresses are always HTTPS. If HTTPS Redirect is turned on:


Visitors to your blog will always go to https://<your-blog>.blogspot.com.

If HTTPS Redirect is turned off:


Visitors to http://<your-blog>.blogspot.com will be served over HTTP, an unencrypted connection.


Visitors to https://<your-blog>.blogspot.com will be served over HTTPS, an encrypted connection. Learn more about HTTPS for your blog.


HTTPS redirect

When you turn on HTTPS redirect, visitors always reach the secure version at https://<your-blog>.blogspot.com.


Permissions

Blog admins and authors

Displays the list of blog’s admins and authors. You can also change or cancel their membership here.


Pending author invites

Displays the users who haven't yet accepted your invite to become an author.


Invite more authors

To add a blog author, enter the email address of the person you want to add. After they accept the invitation, they'll be listed as an author. You can add up to 100 total members (authors, administrators, or readers) to your blog.

Important: A Google account is needed to manage and post to blogs.


Reader access

By default, your blog is public and can be read by anyone online. To limit who can view your blog, in the “Reader access” section, select Public, Private to authors or Custom readers.


Custom readers

Displays the list of blog’s readers.


Pending custom reader invites

Displays the users who haven't yet accepted your invite to become a reader.


Invite more readers

Enter the email address of the person you’d like to read your blog.


Posts

Max posts shown on main page

Select the maximum amount of posts you want shown on the main page.


Post template (optional)

Post templates format the post editor with text or code that will appear each time you create a new post. Learn more about post templates.


Image lightbox

When selected, your images will open on click in an overlay on top of your blog. If your post has multiple images, they’ll appear as thumbnails along the bottom of the screen.


Comments

Comment location

Embedded: Allows users to reply on the post.

Full page and Popup window: Takes users to a new page to make their comment.

Important: When you choose "Hide," it doesn't delete the existing comments. You can show them at any time by selecting another option.


Who can comment?

You can manage who can comment on your blog posts in Blogger. In "Who Can Comment," select:


Anyone (including anonymous)

Users with Google Accounts

Only members of this blog

Comment moderation

Review comments before they’re published. Go to the Comments view to review comments. Learn more about comment moderation.


For posts older than

If you selected "Sometimes" in the comment moderation section, only comments within that range of time will go into the moderation section.

Email moderation requests to

You’ll receive an email alert when you get a new comment on your blog.​

Reader comment captcha

If someone wants to leave a comment on your blog, they’ll need to complete a word verification step. Learn how to prevent unwanted comments. Blog authors won't see word verification for comments.


Important: Even if this setting is turned off, some commenters may be asked to enter a code before posting.


Comment form message

This message is displayed beneath the comment box.


Email

Post using email

Email is also known as Mail2Blogger. Use this address to post text and images directly to your blog.


Comment notification email

We’ll notify these addresses when someone leaves a comment on your blog.


Pending comment notification emails

Displays the users who haven't yet accepted your invite to receive comment notification emails.


Invite more people to comment notification emails

You can enter up to 10 email addresses, separated by commas.


Email posts to

Whenever you publish a new post, an email will be sent to these addresses.


Pending post notification emails

Displays the users who haven't yet accepted your invite to receive post notification emails.


Invite more people to post notifications

You can enter up to 10 email addresses, separated by a comma.


Formatting

Time zone

Set your time zone.


Date header format

This is how the date will appear above your posts.


Timestamp format

This is how the post’s timestamp will appear.


Comment timestamp format

This is how the comment’s timestamp will appear.


Meta tags

Enable search description

Set the blog's search description. Help users select your blog in search results by writing a summary of what your blog is all about. Learn more about blog descriptions.


Errors and redirects

Custom 404

Set the blog's 404 page not found message. Enter a message to display on the 404 page instead of the generic message.


Custom redirects

Set the blog's custom redirects. Add custom redirects for URLs that point to pages of your blog.


From

Add the deleted URL. If the original article was deleted, select Permanent.

To

Add the URL you want to point to.


Crawlers and indexing

Enable custom robots.txt

Set your blog's custom robots.txt content. This text will be used instead of the default robots.txt content to search engines. Learn more about robots.txt content.


Enable custom robots header tags

Set the blog's custom robots header tags. These flags are used to set the robots header tags served to search engines. Learn more about robots header tags.


Google Search Console

Link to the search console.


Monetization

Enable custom ads.txt

Set the blog's custom ads.txt content. The ads.txt file allows you to specifically identify and authorize resellers of your digital ads inventory. Learn more about Custom ads.


Manage blog

Import content

You can import .xml files of your posts and comments into your blog.


Back up content

When you back up your blog, you get an .xml file of the posts and comments.


Videos from your blog

You can download or delete videos from your blog.


Remove your blog

When you delete a blog you have a short period of time to restore it. When you permanently delete a blog all of your blog information, posts, and pages will be deleted and you won’t be able to restore them.


Important: Deleted blogs can be restored within 90 days before they're removed forever. You can create another blog at this address using the Google Account that you're currently logged in with. Before you delete your blog, you can export it.


Site feed

Allow blog feed

Full: Distributes the entire contents of your post.

Until Jump Break: Shows all post content before your jump break. Learn more about Jump Breaks.

Short: Distributes approximately the first 400 characters.

None: If you select "None," your blog's XML feed will be disabled.

Custom: Set advanced options for blog posts, comment feed, or per-post comment feed.

Blog post feed

Select how much of your post's content you want to share.

Blog comment feed

Select how much of your comments’ content you want to share.

Per-post comment feeds

Select how much of your per-post comments content you want to share.

Post feed redirect URL

If you’ve burned your post feed with FeedBurner, or used another service to process your feed, enter the full feed URL here. Blogger will redirect all post feed traffic to this address. Leave this blank for no redirection.


Post feed footer

This will appear after each post in your post feed. If you use ads or other third-party feed additions, you can enter that code here. You must also set “Allow blog feed” to Full.


Title and enclosure links

This adds the title link and enclosure link options in the post editor.


Title links allow you to set a custom URL for your post title.

Enclosure links are used to make podcasts, MP3s, and other content in your posts playable in feeds like RSS and Atom.

General

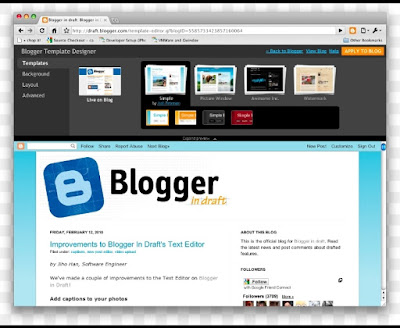
Use Blogger draft

Blogger draft is Blogger in beta version. Enable it to test new features before they’re rolled out to all Blogger users.


Use analytics on blog


User profile 

Follow the link to manage your user profile


                                    Harshit (author)

Use analytics with blogger

 You can use Analytics to find out where your readers come from and what they read on your blog. Learn more about Analytics.


Step 1: Sign up for Analytics


Sign up for an Analytics account.

Find your Analytics tracking ID.


Step 2: Add Analytics tracking to Blogger

Important: It can take up to 24 hours for your data to show up in Analytics.


Sign in to Blogger.

In the top left, select the blog you want to analyze.

From the menu on the left, click Settings.

Under "Basic," click Google Analytics Property ID.

Enter your Analytics tracking ID.

Make sure you enter the ID in this format: UA-XXXXX-XX.

Click Save

More:


Create a blog and start earn


Advertise on your blog


Wednesday, April 21, 2021

Setup a custom domain

 Important: If you use CAA Records on your custom domain, you must add a record for letsencrypt.org. If you don’t, Blogger won't create or renew your SSL certificate.

Set up a domain


To personalize your blog’s website address, you can buy a domain. If you’re an administrator, you can manage domains registered through Blogger.


Find your blog on search engine


Step 1: Buy a domain:


Important: If Google Domains aren’t supported in your country, you can buy a domain from a non-Google provider. Learn more about Google Domains availability.


To buy a Google domain:


Sign in to Blogger.

In the top left, select a blog.

From the menu on the left, click Settings.

Under "Publishing," click Custom domain and then Buy a domain.

At the top, search for a domain.

Next to the domain you want, click Buy.

Follow the on-screen instructions.

Step 2: Set up your domain with your blog

Connect to your Google Domain from Blogger

Sign in to Blogger.

In the top left, select a blog.

From the menu on the left, click Settings.

Under "Publishing," click Custom domain.

Enter the preferred URL for your blog.

Click Save.

Connect to your non-Google domain from Blogger

 Important: It may take up to 24 hours for your “blogspot.com” address to redirect you to your custom domain.


Step 1: Set up your domain in Blogger 


Sign in to Blogger.

In the top left, select a blog.

From the menu on the left, click Settings.

Under “Publishing,” click Custom domain.

Type the URL of the domain you've purchased.

Click Save.

You'll get an error with two CNAMEs:

Blog CNAME: For name, enter the name as the subdomain, like "blog." or "www." For destination, enter “ghs.google.com.”

Security CNAME:  “Name: XXX, Destination: XXX.” This is different for each person and is specific to your blog and your Google Account.

Step 2: Set up your non-Google domain provider settings

Go to your domain provider’s website and find the Domain Name System (DNS) in the control panel.

Under "Name, Label or Host," enter the subdomain from step 7 above.

Under "Destination, Target or Points to," enter "ghs.google.com."

Enter details for the second CNAME, which are specific to your blog and Google Account.


To activate your DNS settings, wait at least one hour.


Repeat Step 1: Set up your domain in Blogger.

Step 2 (optional): Redirect from the URL without subdomain to your blog’s URL

To redirect your readers from “mydomain.com” to “www.mydomain.com,” set up a naked redirect:


Go to your domain provider’s website.

Open your DNS settings.


Advertise on your blog


If you have problems, try these steps:


When you set up your domain, you may not have to enter the 2 CNAMEs.

Make sure the "Name, Label, or Host" CNAME is correct.

If your custom domain doesn’t work, wait before you try the steps again. If you have problems, contact your domain provider.


Harshit (author)

Saturday, April 17, 2021

Crypto currency, History of crypto currency

 A crypto-currency, or crypto is a digital asset designed to work as a medium of exchange wherein individual coin ownership records are stored in a ledger existing in a form of a computerized database using strong cryptography to secure transaction records, to control the creation of additional coins, and to verify the transfer of coin ownership.It typically does not exist in physical form (like paper money) and is typically not issued by a central authority. Crypto currency  typically use decentralized control as opposed to centralized digital currency and central banking systems.When a cryptoc is minted or created prior to issuance or issued by a single issuer, it is generally considered centralized. When implemented with decentralized control, each crypto currency works through distributed ledger technology, typically a blockchain, that serves as a public financial transaction database.


Bitcoin, first released as open-source software in 2009, is the first decentralized cryptocurrency.Since the release of bitcoin, other crypto currencies have been created.

Crypto currency


Create a blog,start a blog and earn extra


History


In 1983, the American cryptographer David Chaum conceived an anonymous cryptographic electronic money called ecash. Later, in 1995, he implemented it through Digicash, an early form of cryptographic electronic payments which required user software in order to withdraw notes from a bank and designate specific encrypted keys before it can be sent to a recipient. This allowed the digital currency to be untraceable by the issuing bank, the government, or any third party.


In 1996, the National Security Agency published a paper entitled How to Make a Mint: the Cryptography of Anonymous Electronic Cash, describing a Crypto currency system, first publishing it in an MIT mailing list and later in 1997, in The American Law Review (Vol. 46, Issue 4)

Crypto currency


In 1998, Wei Dai published a description of "b-money", characterized as an anonymous, distributed electronic cash system.Shortly thereafter, Nick Szabo described bit gold. Like bitcoin and other crypto currency that would follow it, bit gold (not to be confused with the later gold-based exchange, BitGold) was described as an electronic currency system which required users to complete a proof of work function with solutions being cryptographically put together and published.


The first decentralized crypto currency, bitcoin, was created in 2009 by presumably pseudonymous developer Satoshi Nakamoto. It used SHA-256, a cryptographic hash function, in its proof-of-work scheme. In April 2011, Namecoin was created as an attempt at forming a decentralized DNS, which would make internet censorship very difficult. Soon after, in October 2011, Litecoin was released. It used scrypt as its hash function instead of SHA-256. Another notable crypto currency Peercoin used a proof-of-work/proof-of-stake hybrid.


Advertise on your blog and earn money


 6 August 2014, the UK announced its Treasury had been commissioned a study of crypto currency and what role, if any, they could play in the UK economy. The study was also to report on whether regulation should be considered.

                                          Harshit (author)


Thursday, April 15, 2021

Manage blogs you follow

 You can read the latest posts on your favorite blogs by adding them to the reading list on your Blogger dashboard.


Manage blogs you follow


Follow a blog


Your Google profile, including your name and profile photo, will show up publicly as a follower of a blog when you use the Followers gadget. You can change your Google profile any time. To follow a blog anonymously, follow it from the Blogger dashboard or the Settings menu.


Make it easy to find your blog on search engine


From the blog’s Followers gadget

Sign in to Blogger.

In the blog that you want to follow, look for the Followers gadget.

Click Follow.

In the window that appears, click Follow.


From your Blogger dashboard

Sign in to Blogger.

In the left menu, click Reading list Bookmark.

In the top right, click Manage reading list Edit.

Click Add.

Type the URL of the blog you want to follow.

Click Next.

Choose whether to follow publicly or anonymously.

Click Follow.


Stop following a blog


From your Blogger dashboard

Sign in to Blogger.

In the left menu, click Reading list Bookmark.

In the top right, click Edit Edit.

Next to the blog you want to remove, click Delete Delete .


From the blog’s Followers gadget

Sign in to Blogger.

In the blog that you don’t want to follow anymore, look for the Followers gadget.

Click Unfollow.

In the window that appears, click Unfollow.


Let readers follow your blog


To let other people follow your blog, add the Followers gadget:

Sign in to Blogger.

In the top left, click the Down arrow Down arrow.

Choose the blog to update.

In the left menu, click Layout.

Choose where you want to add the Followers gadget.

Click Add a Gadget.

In the window that opens, click More Gadgets.

Look for “Followers” and click Add Add.

Choose your settings.

Click Save.

To save the arrangement, in the bottom right, click Save Save.

Content sharing on other sites

 Turn on Share buttons

Important: Your blog must be public to use share buttons.


To let others share your blog through email and social media sites, you can turn on Share buttons:


Content sharing


Sign in to Blogger.

In the top left, select a blog.

From the menu on the left, click Layout.

In the "Page Body" section, next to "Blog Posts," click Edit Edit.

Check the box next to "Show Share Buttons."

Use site feeds to share your content on other websites

When your web content is updated, site feeds notify users on other websites.


Advertise on your blog


Select the content to share


Sign in to Blogger.

In the top left, select a blog.

From the menu on the left, click Settings.

Under "Site feed," click Allow blog feed and select how much of your content to share.

Full: Show all content of each post.

Until Jump Break: Show content before your jump break.

Short: Shows an excerpt from the beginning of each post.

Custom: Set advanced options for blog posts, comment feed, or per-post comment feed.

None: Turn off site feed entirely.

Click Save.

Use Blogger feeds to share content

Important: Site feeds don't work with private blogs.


To share your blog, you can add the URLs below to your feed reader.


Share all content


Important: For these URLs, you must replace blogname with your blog address.


Full-site feeds are updated in real time. Developers can subscribe to low-latency updates by using the PubSubHubbub protocol.


Atom 1.0: http://blogname.blogspot.com/feeds/posts/default

RSS 2.0: http://blogname.blogspot.com/feeds/posts/default?alt=rss

Share the comments

Important: For these URLs, you must replace blogname with your blog address.

Atom 1.0: http://blogname.blogspot.com/feeds/comments/default

RSS 2.0: http://blogname.blogspot.com/feeds/comments/default?alt=rss


Create a blog ,,easy steps


Share your posts by label

Important: For these URLs, you must replace blogname with your blog address and label with the label you want to use to share.


To get a feed for a specific label, change [label].


Atom 1.0: http://blogname.blogspot.com/feeds/posts/default/-/[label]

RSS 2.0: http://blogname.blogspot.com/feeds/posts/default/-/[label]?alt=rss

Share comments by post

Important: For these URLs, to get a feed for post comments, you must replace blogname with your blog address and postID with the correct ID of your post. 


To get a feed for post comments, replace postID with the correct ID of your post.


Atom 1.0: http://blogname.blogspot.com/feeds/<postId>/comments/default

RSS 2.0: http://blogname.blogspot.com/feeds/postId/comments/default?alt=rss


To find the Post ID of an individual post:


Sign in to Blogger.

In the top left, select a blog.

From the menu on the left, click Posts.

Click the title of the post you want to share.

In the browser's address bar, your URL will show up as: 

"“www.blogger.com/blog/post/edit/<blogId>/<postId>”

Copy the second Post ID number.

Use other feed providers to share content

If you use FeedBurner or other services, redirect your feed to complete the setup:


Copy the site feed from the service.


Sign in to Blogger.

In the top left, select a blog.

From the menu on the left, click Settings.

Under "Site feed," click Post feed redirect URL.

Paste the URL.

Click Save

Monday, April 12, 2021

Control Access to your blog

 You can control who can read, edit, and manage your blog. You can add up to 100 total members including authors, administrators, or readers.

Control Access to your blog


Add team members to your blog

Important: To manage and post to blogs, invited authors and administrators need a Google Account.


To invite readers to your blog: 


Sign in to Blogger.

In the top left, select a blog. 

From the menu on the left, click Settings.

Under "Permissions," click Invite more readers.

Enter the email addresses of the people you want to add.

Click Send.


Give a team member admin access

To make someone an admin, go to the menu next to their name and select Admin.


Admins on your blog can: 


Add or remove other admins and authors.

Change the blog's settings or template.

Edit or delete any posts.

If an admin loses access to the blog, another admin will need to give permission back. If you're the only admin, try other accounts you manage to check if you have access to the blog.


Remove access from a team member or yourself

Important: After you revoke access, their previous posts will still show up on the blog but they won’t be able to edit them.


Sign in to Blogger.

In the top left, select a blog.

From the menu on the left, click Settings.

Under "Permissions," click Blog admins and authors.

Find the team member you want to remove and click Delete this member Remove.


Move a blog to a new owner

Important: Blogger is unable to mediate disputes over blog ownership.

To move a blog from one owner to another:


Follow the steps to give a selected team member admin access.

Remove access to the original blog owner.

Tip: If the new blog owner wants to change the original blog owner’s name from a post, they’ll have to delete and republish the post.


Add authors to your blog 

Important: To manage and post to blogs, invited authors and administrators need a Google Account.


Authors can add and edit their own posts on your blog. 


To invite new authors:


Sign in to Blogger.

In the top left, select a blog.

In the left menu, click Settings.

Under "Permissions," click Invite more authors.

Enter the email address of the person you want to add.

Click Send.

After they accept the invitation, they'll be listed as an author.


Make your blog private

Important: After you make your blog private, people who have the web address of an image may still be able to view it.


By default, your blog is public and can be read by anyone on the web. 


To change who can access your blog:


Sign in to Blogger.

In the top left, select a blog.

From the menu on the left, click Settings.

Under “Permissions,” click Reader access and select from these options:

Public: Anyone on the web can access and read your blog.

Private to authors: All authors of your blog can access and read it.

Custom readers: Only the readers you invite can access and read your blog.


Remove access to your blog

 If you want someone to no longer have access to your blog, you can remove their access:


Sign in to Blogger.

In the top left, select a blog.

From the menu on the left, click Settings.

Under "Permissions," click Custom readers.

Next to the person you want to remove, click Delete this member Remove.


Limit access to adult content

Important: If a blog with adult content doesn’t include a content warning, and is brought to Google’s attention, we’ll turn on the warning for you. If this happens repeatedly, the blog may be removed.


If your blog contains adult themes or language, you have to add a warning page before people can access your blog’s content.


Adult content warning is required: For pornographic or sexually explicit content.

Adult content warning is not required: For non-sexual documentary depictions of nudity and depictions of nudity that serve a clear educational, documentary, scientific, or artistic purpose.


Add the adult content warning

If your blog has content that you believe isn’t suitable for all ages, you can show a content warning to your readers:


Sign in to Blogger.

In the top left, select a blog.

From the menu on the left, click Settings.

Under "Basic," turn on Adult content