Sunday, April 11, 2021

Make it easy to find your blog on search engine

 You can make it easier for people to find your blog on search engines like Google and Bing when you:

Optimization


List your blog on search engines.

Use keywords throughout your site to help it show up higher in search results.


To let search engines find your blog:


Sign in to Blogger.

In the top left, choose a blog to list.

From the menu on the left, click Settings.

Under "Privacy," turn on Visible to search engines.

Search Engine Optimization (SEO) tips for your blog

You can use relevant keywords in the titles and text on your posts and pages. You can also tell search engines which pages, posts, and links to ignore so they won’t show up in search results.


Add keywords to your post and page titles

To improve the ranking of your posts and pages in searches:


Include keywords that explain what the post or page is about.

Try to keep your titles under 60 characters. Short and concise titles are more readable and don’t get cut off.


Add headers

To tell search engines what your post is about, you can add headers like H1, H2, H3, and more. To add headers:


Sign in to Blogger.

In the top left, choose the blog where you want to add headers.

From the menu on the left, click Posts.

Click the title of the post you want to edit.

Highlight the text you want to make into a header.

In the menu, click Paragraph Menu.

Choose the type of heading you want.


Make your images searchable

To make your images searchable and accessible to all readers, you can add a short description, alt text, or title:


Sign in to Blogger.

In the top left, choose a blog.

Add an image to your post and click on it.

Click Edit Edit.

In the text box: 

In the “alt” section: Add a long description.

In the “title” section: Add a short description.

Click Update.

Hide pages from searches

Important: You can hide posts and pages that fall under the tags you select. To block certain posts, in the post editor settings, under "Custom robots tags," turn on No index.


If you don’t want search engines to find certain pages or posts, you can hide them. To hide pages:


Sign in to Blogger.

In the top left, choose a blog.

In menu on the left, click Settings.

Under "Crawlers and Indexing," turn on Enable custom robots header tags.

Click Home page tags, Archive and search page tags, or Post and page tags.


Tell search engines not to follow certain links

Sign in to Blogger.

In the top left, choose a blog.

From the menu on the left, click Posts.

Click the post you want to hide.

At the top, click Link Insert link and then Create/edit URL.

Check the box next to Add ‘rel=nofollow’ attribute.

Click OK.

Change or redirect your URL

Rewrite your URLs

To make your posts more readable and help search engines understand what they’re about, you can rewrite the URL of your posts: 


Sign in to Blogger.

In the top left, choose a blog to update.

From the menu on the left, click Posts and then New Post New post.

On the right, under "Post Settings," click Permalink.

Select Custom Permalink and enter the URL you want to use.

Click Publish or Save.


Create a redirect for a URL

To redirect URLs from your blog to new posts or pages:


Sign in to Blogger.

In the top left, choose a blog.

From the menu on the left, click Settings.

Under "Errors and redirects," click Custom redirects and then Add.

Add the deleted URL and the URL you want to redirect it to. 

If the original article was deleted, turn on Permanent.

Click OK and then Save.

Harshit(author)

Saturday, April 10, 2021

Advertise on your blog

  Important: Advertisements are not allowed on adult blogs. Learn more about the Blogger Content Policy and Terms of Service.

Advertising on your blog


To make money with Blogger, you can show AdSense and other ads on your pages.


Sign up for AdSense

Important: Make sure you complete all the steps before you click Redirect.


Sign in to Blogger.

In the top left, select a blog.

From the menu on the left, click Earnings and then Create AdSense account.

If your blog isn't currently eligible, learn how to qualify for AdSense.

Select the Google email associated with your Blogger account.

Fill out AdSense form and click Create account.

Enter your payment details and verify your phone number.

Click Submit.

The system should automatically take you to Blogger to complete the process. If it doesn't, click Redirect.

Tip: If you’re interrupted before you complete the steps, complete steps 1-5 again. If your AdSense homepage says "We're working on setting you up" for more than a few days, click Accept association.


Show ads between your posts

Sign in to Blogger.

In the top left, choose the blog where you want to show ads.

From the menu on the left, click Layout.

Based on your template:

In "Blog Posts," under "Page Body," click Edit.

In "Blog Posts," under "Main," click Edit.

Check the box next to "Show Ads Between Posts."

Choose the ad format, colors, and how often you want the ads to show up.

Click Save. 

To save the arrangement, in the bottom right, click Save Save.


Show ads in the columns

Sign in to Blogger.

In the top left, choose the blog where you want to show ads.

From the menu on the left, click Layout.

Under "Sidebar," click Add a Gadget.

Next to Adsense, click Add Add.

Configure AdSense and click Save.

To save the arrangement, in the bottom right, click Save Save.


Show ads from other ad services

Sign in to Blogger.

In the top left, choose the blog where you want to show ads.

From the menu on the left, click Layout.

Point to the space where you want to show ads and click Add a gadget.

In the pop-up window, next to "HTML/Javascript," and click Add Add.

Optional: Enter a title.

In the "Content" section, copy and paste the code from the ad service website.

Click Save. 

To save the arrangement, in the bottom right, click Save Save.


Review your Blogger earnings report

Sign in to Blogger.

In the top left, choose a blog to review.

From the menu on the left, click Earnings and then View earnings.

Tip: To learn what each term on your report means, use the AdSense glossary.


What to do if AdSense doesn't turn on

Important: To check that your account is still active, go to AdSense.


Sign in to Blogger.

In the top left, choose a blog.

From the menu on the left, click Layout.

Under the AdSense gadget, click Edit and then Save.

Repeat step 4 for each AdSense gadget on your blog.

At the bottom of the "Blog Posts" gadget, click Edit and then Save.

To save the arrangement, in the bottom right, click Save Save.


Set up an ads.txt file

If your blog is monetized with third-party providers or you’ve manually integrated AdSense in your blog, you need to manually set up the content of the ads.txt file. Learn more about ads.txt for AdSense.


Sign in to Blogger.

In the top left, choose the blog you want to set up.

From the menu on the left, click Settings.

Under "Monetization," turn on Enable custom ads.txt.

Click Custom ads.txt.

Copy the settings from your third-party monetization provider and paste them in the text box.

Click Save.

Tip: To check the content of your ads.txt file, go to http://<your blog address>/ads.txt

Create a blog,easy steps

Friday, April 9, 2021

Sign in to multiple accounts

 You can add and switch between multiple Blogger accounts.

Sign in to multiple accounts


Add an account

Sign in to Blogger.

In the top right, click your profile image or initial.

Click Add another account.

Sign in to the account you want to add.

Switch between accounts

Important: If you don't want to sign out and sign back in each time you switch accounts, learn how to set up profiles in Chrome.


You can only switch accounts when you write blog posts or manage your blog.


Sign in to Blogger.

In the top right, click your profile image or initial.

Click the account you want to switch to.

A new window will open for this account.

View, follow, or comment on a blog

If you're signed in to the wrong account, try to sign out and sign back in:


On your computer, go to Blogger.

In the top right, click your profile image or initial.

Click Sign out or Sign out of all accounts.

Sign in to the account you want to use.

Go back to the blog you want to view, follow, or add a comment

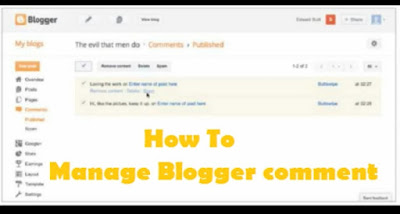
Manage your comments

 You can manage who comments on your posts and the type of comments they can leave. You can also comment on other people’s blogs. There’s no limit to how many comments can be left on a post.

Manage your comments


Manage your blog's comments

Set your Blogger comment settings

Sign in to Blogger.

In the top left, select a blog.

From the menu on the left, click Settings.

Under “Comments,” adjust your comment settings:

Comment location: To allow responses to your post’s comments, select Embedded.

Who can comment: To restrict anonymous comments, select Users with Google Accounts or Only members of this blog.

Comment moderation: If you want to approve comments, select Always or Sometimes. If you don’t want to approve comments, select Never.

Click Save.

Tip: To turn on comment settings in the Post Editor, click Options Settings.


Moderate comments

Important: Only admins can moderate comments.


To review comments before they publish, turn on Comment moderation:


Sign in to Blogger.

In the top left, select a blog.

From the menu on the left, click Settings.

Under "Comments," click Comment moderation.

Choose how often you want to review comments and click Save.


Approve or delete a comment

Sign in to Blogger.

In the top left, select a blog.

From the menu on the left, click Comments.

From the drop-down menu at the top, select Awaiting moderation.

Read the comment and click Publish, Delete, or Spam.

Publish or reject comments from your email

If you enter an email address to manage comments, when someone leaves a new comment, you'll get an email. In the email, click Publish, Delete, or Mark as spam.


If you select Mark as spam, the comment is deleted.

Delete or mark comments as spam

You can delete or mark a published comment as spam:


Sign in to Blogger.

In the top left, select a blog.

From the menu on the left, click Comments.

From the drop-down menu at the top, select Published.

To move it to your Spam folder, under the comment, click Delete, Remove or Spam.

Tip: To manage your comments in Spam, click Comments. From the drop-down menu at the top, click Spam.


Comments that are automatically marked as spam are sent to this folder. If you want a comment to show on your blog, click Not spam.


Prevent unwanted comments

To prevent spam comments from automated software on your blog, you can ask visitors to enter a short code before they can post:


Sign in to Blogger.

In the top left, select a blog.

From the menu on the left, click Settings and then  Comments.

Under "Reader comment captcha," turn on Show word verification for readers who comment.

Manage comments left on other blogs

Important: If you want to delete or manage your comments, make sure you're signed in to your Google Account. You can't manage comments you posted anonymously.


Post a comment on a blog

Sign in to Blogger.

Under the blog post you want to add a comment, enter your comment.

Optional: To get emails when someone replies to your comment, click Notify me.

Click Publish.


Delete a comment you posted on a blog

Sign in to Blogger.

Find the blog post with the comment you want to delete and click Read more.

Under the comment you want to delete, click Delete and then Delete comment

Thursday, April 8, 2021

Add images & videos to your blog

 You can add photos, videos, and other images to your blog posts. When you add images to your blog, they’re stored in a Google Album Archive.

Add images to blog


According to Blogger's copyright policy, you’re not allowed to add


Content that’s hosted by someone else without their consent.

Copyrighted material without authorization.

Any content that violates the Blogger content policy.

Add an image to a blog post

Important: If the height or width of a photo exceeds 2,048 pixels or if a video is longer than 15 minutes, it’ll count toward your storage limit.


To add an image to your blog post:


Sign in to Blogger.

In the top left, select a blog.

Click the post you want to edit or create a new post.

At the top, click Insert image Insert image.

Choose from where you want to upload the image.

Select one or more images and click Insert.

To change the size, caption, or alignment of the image after you add it, click the image. 

Manage your images

Stop images from opening in an overlay

Important: Before you can open images in your blog, you need to turn off Dynamic Views.

Lightbox lets images in your blog automatically open in a large overlay. If you don’t want images to open in Lightbox:


Sign in to Blogger.

In the top left, select a blog.

From the menu on the left, click Settings.

Under "Posts," turn off Image lightbox.


Delete images from an album

To delete images from your albums, visit the Album Archive. From the Album Archive, you can manage your albums and images at any time.

Tip: If you add a photo to your blog from a private folder, a copy is saved to the blog album in the Album Archive. To completely remove the photo, delete it from the private folder and the blog album.


Add a video to your blog post

Sign in to Blogger.

In the top left, select a blog.

Click the post where you want to add a video.

At the top, click Insert video Insert a video.


You can upload a video from your computer or choose a video from YouTube.


Select a video and click Insert.


Manage your videos

If you’re a blog owner: You can view, download, and delete all videos uploaded to your blog. 

If you’re a blog author: You can view, download, and delete videos that you’ve personally uploaded to your blog.

To download or delete a video:

Sign in to Blogger.

In the top left, select a blog.

From the menu on the left, click Settings. 

Under "Manage blog," click Videos from your blog. 

Select a video from your video library. 

To delete it: click Delete. 

To download it: click Download.

Fix issues with images and videos

If you have problems when you try to upload images or videos to your blog, try these steps:


Clear your cache and cookies.

Turn your pop-up blocker off or, in your browser settings, allow pop-ups from Blogger.com.

Turn off any plugins you’ve installed on your browser.

Make sure you’ve installed the latest version of your browser

Wednesday, April 7, 2021

Create,edit ,manage, or delete a post,,, blogger tips

 You can write, edit, or delete posts and drafts any time.


Write a new post

Sign in to Blogger.

Click New Post New post.

Create the post.

To check how your post will look when it’s published, click Preview.

Save or publish your post:

To save and not publish: Click Save.

To publish: Click Publish.

Write a new post in blogger


Add labels to your post

You can use labels to organize your posts. Your readers can use your labels to filter the content they get.


Sign in to Blogger.

To open the editor view, click an existing post or click New post New post.

On the right, click Labels Label.

Enter a label or click an existing label.

To add more than one label to a post, separate labels with commas.

Tip: In your dashboard, next to the title, you can find your labels.


Filter your posts with labels

Sign in to Blogger.

In the upper right, click Labels Label.

Select any number of labels.

Click Apply.

Publish a post.


Schedule a post

​Sign in to Blogger.

Under the name of a blog, click Posts Posts and then the title of the post you want to publish.

On the right sidebar, next to Published on Published on, click the drop-down arrow Down arrow.

Select Set date and time.

On the calendar, choose a date and time, then click Publish.

If you want to reschedule a published post, click Revert to draft.

To set your time zone:

In the main dashboard’s left menu, click Settings Settings.

Go to the “Formatting” section and click Time zone.

In the pop-up window, select a time zone.

Click Save.


Use email to post to your blog

To create an email:

Sign in to Blogger.

In the top left, click the Down arrow Down arrow.

Click the name of a blog.

In the main dashboard’s left menu, click Settings Settings.

Go to the “Email” section and click Post using email.

In the pop-up window, select Publish email immediately or Save emails as draft posts.

Under “Email for posting,” create an email address to use for posts.

Click Save.

To post by email:

Important: Anyone who emails this unique email address will be able to post on your blog, as you.


Create a new email.

In the subject of the email, enter the title of your post.

In the body of the email, enter your post.

To mark the end of your post, enter #end.

To include an image, attach an image to your email.


Edit a post

Sign in to Blogger.

Under the name of a blog, click Posts.

Click the title of the post.

Make your changes.

To check how your post will look when it’s published, click Preview.

For posts that:

Have been published: Click Update or Revert to draft.

Haven’t been published: Click Publish or Save.


Delete a post

​Sign in to Blogger.

In the top left, click the Down arrow Down arrow.

Click the name of a blog.

Point to the post you want to delete. When it appears, click Delete Delete.

Format a post

Add a “Read more” link

In your blog’s index page, readers can preview a post, then click the "Read more" link to view the full post.

Sign in to Blogger.

In the top left, click the Down arrow Down arrow.

Click the name of a blog.

Click the post where you want to add a link.

In the composer box, click where you want to add the "Read more" link.

Click Insert jump break Insert jump break.


Create a post template

Sign in to Blogger.

In the top left, click the Down arrow Down arrow.

Click the name of a blog.

In the left menu, click Settings Settings.

In the “Posts” section, click Post template.

Add your template.

Click Save.


Use keyboard shortcuts

Windows and Linux


Action - Shortcuts

Format text for bold, italics, and underline- Ctrl + b, Ctrl + i, Ctrl + u

Remove formatting- Ctrl + Space

Open link dialog- Ctrl + k

Undo- Ctrl + z, Ctrl + Shift + z

Redo- Ctrl + y


Mac

Action -  shortcuts

Format text for bold, italics, and underline- ⌘ + b, ⌘ + i, ⌘ + u

Open link dialog- ⌘ + k

Undo- ⌘ + z, ⌘ + Shift + z

Redo- ⌘ + y


Content to avoid

Do not use:


Material hosted by someone else without their consent.

Copyrighted materials.

Content that violates our content policy. This includes, but is not limited to, explicit imagery posted without the subject’s consent and hateful, violent, or crude content.

Add pages to your blog

Important: You can't use specific posts as pages.


You can create pages for consistent content like “About” or “Contact.” Pages can show up as tabs at the top of your blog or as links on the side.


Step 1: Show your pages

Sign in to Blogger.

In the top left, select a blog.

From the menu on the left, click Layout.

In the section you want your pages to show, click Add a Gadget.

In the window, next to "Pages", click Add .

Set your settings and click Save.

To save the arrangement, in the bottom right, click Save Save.

Tip: To change where your page shows up, drag the gadget to a new location.

Blogging


Step 2: Create, edit, or delete pages

Important: There’s no limit to the number of pages you can have in one blog. 


Create a new page

Sign in to Blogger.

In the top left, select a blog.

From the menu on the left, click Pages.

In the top left, click New Page.

Enter a page title and other information.

In the top right, click Save, Preview page, or Publish.

Create a page with a link to another website

Sign in to Blogger.

In the top left, select a blog.

From the menu on the left, click Layout.

In the “Page List (Top)” section next to “Pages,” click Edit Edit.

Under "Pages to show," click + Add external link.

Enter the page title and URL and click Save Link and then Save.

Edit a page

Sign in to Blogger.

In the top left, select a blog.

From the menu on the left, click Pages.

Click on the title of the page you want to edit.

Edit your page. 

In the top right, click Save, Preview page, or Publish.

Delete a page

Sign in to Blogger.

In the top left, select a blog.

From the menu on the left, click Pages.

Point to the page you want to remove.

Click Delete this page and then Delete page.

Step 3: Select the pages to show

From the menu on the left, click Layout.

In the “Pages” section, click Edit Edit.

Select the pages you want to show and click Save.

To save the arrangement, in the bottom right, click Save